Starting from the 2024R1 version, if users need to perform the same or similar data formatting steps with each new project, a data formatting preset can be created and applied for new projects.
A typical workflow for using data formatting presets is as follows:
- Data formatting steps are performed on a specific project.
- Steps are saved in a data formatting preset.
- Preset is reapplied on multiple new projects (manually or automatically).
Creating a data formatting preset
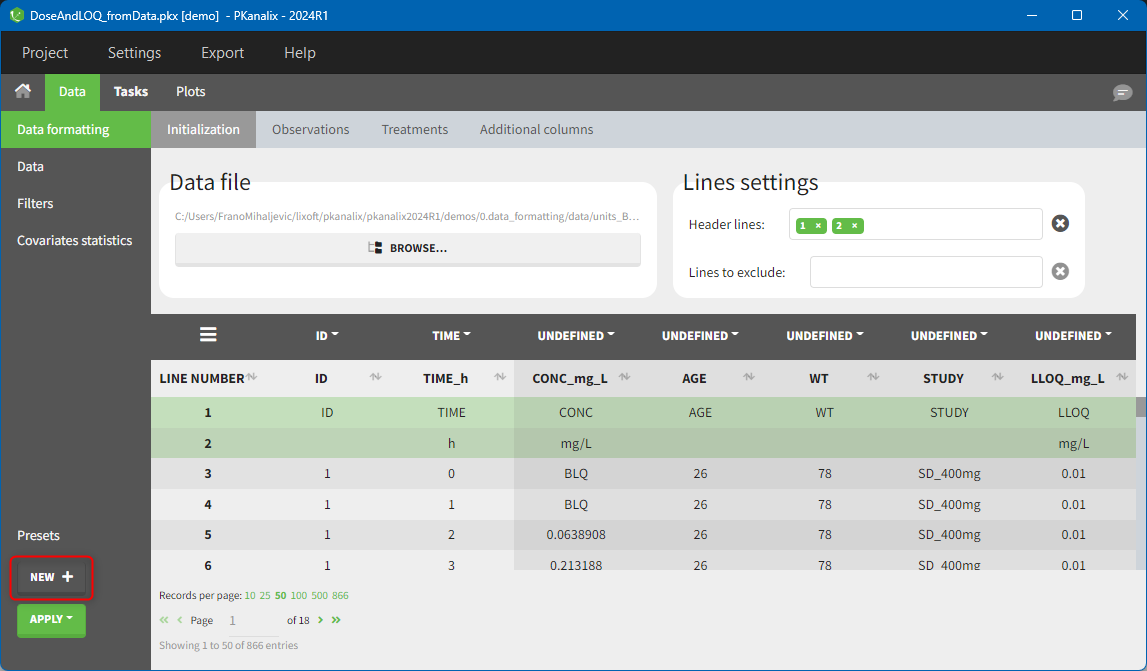
After data formatting steps are done on a project, a preset can be created by clicking on the New button in the bottom left corner of the interface, while in the Data formatting tab:
Clicking on this button will open a pop-up window with a form that contains four parts:
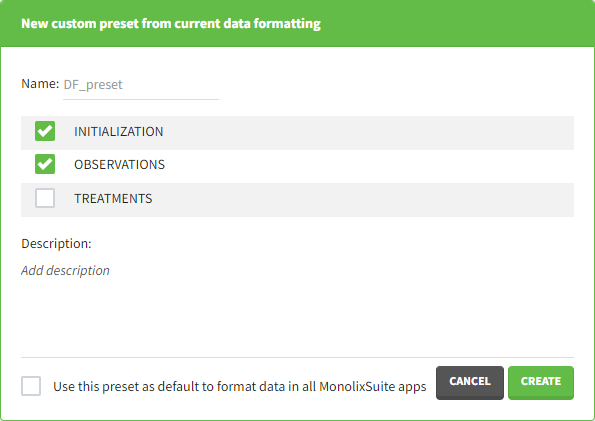
- Name: contains a name of the preset, this information will be used to distinguish between presets when applying them.
- Configuration: contains three checkboxes (initialization, observations, treatments). Users can choose which steps of data formatting will be saved in the preset. If option “External” was used in creating treatments, the external file paths will not be saved in the preset.
- Description: a custom description can be added.
- Use this preset as default to format data in all MonolixSuite apps: if ticked, the preset will be automatically applied every time a data set is loaded for data formatting in PKanalix and Monolix.
After saving the preset by clicking on Create, the description will be updated with the summary of all the steps performed in data formatting.
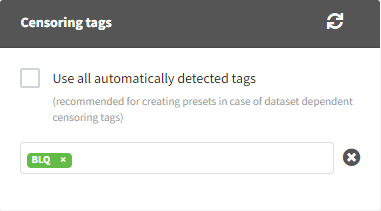
Important to note is that if a user wants to save censoring information in the data formatting preset, and the censored tags change between projects (e.g., censoring tag <LOQ=0.1> with varying numbers is used in different projects), the option “Use all automatically detected tags” should be used in the Observations tab. This way, no specific censoring tags will be saved in the preset, but they will be automatically detected and applied each time a preset is applied.
Applying a preset
A preset can be applied manually using the Apply button in the bottom left corner of the data formatting tab. Clicking on the Apply button will open a dropdown selection of all saved presets and the desired preset can be chosen.
The Apply button is enabled only after the initialization step is performed (ID and TIME columns are selected and the button Next was clicked). This allows PKanalix to fall back to the initialized state, if the initialization step from a preset fails (e.g., if ID and TIME column header saved in the presets do not exist in the new data set).
After applying a preset, all data formatting steps saved in the preset will try to be applied. If it is not possible to apply certain steps (e.g., some censoring tags or column headers saved in a preset do not exist), the error message will appear.
Managing presets
Presets can be created, deleted, edited, imported and exported by clicking on Settings > Manage Presets > Data Formatting.
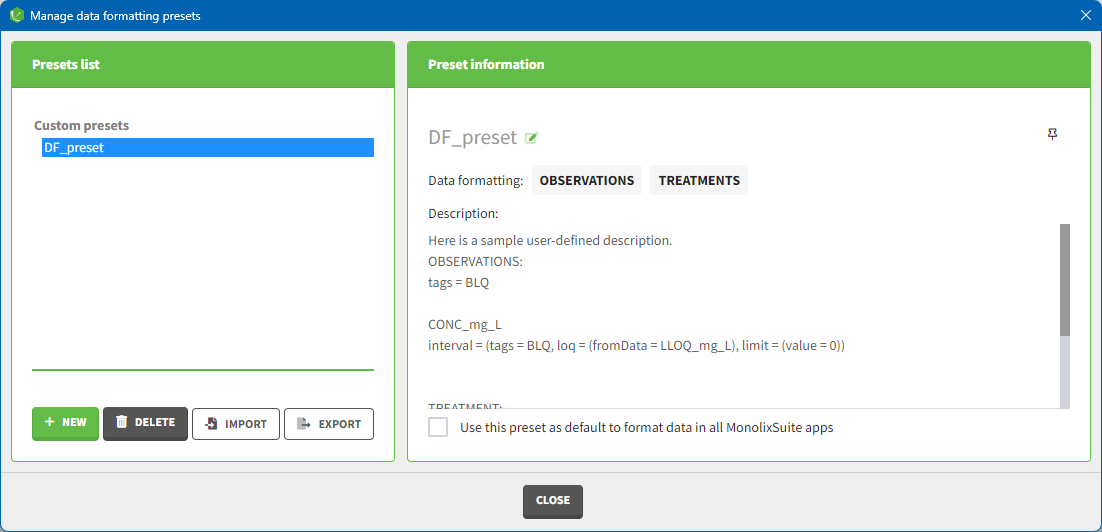
The pop-window allows users to:
- Create presets: clicking on the button New has the same behavior as clicking on the button New in the Data formatting tab (described in the section “Creating a data formatting preset”).
- Delete presets: clicking on the button Delete will permanently delete a preset. Clicking on this button will not ask for confirmation.
- Edit presets: by clicking on a preset in the left panel, the preset information will appear in the right panel. Name and preset description of the presets can then be updated, and a preset can be selected to automatically format data in PKanalix and Monolix.
- Export presets: a selected preset can be exported as a lixpst file which can be shared between users and imported using the Import button.
- Import presets: a user can import a preset from a lixpst file exported from another computer.
Additionally, an option to pin presets (always show them on top) can be used by clicking on the icon to facilitate the usage of presets when a user has a lot of them.